If you are a South Australian Chintaro user and you would like to use the Rent Calculator, there are a number of settings that may need to be changed before you are able to start using the Rent Calculator function.
TABLE OF CONTENTS
- Update System Parameters
- Update Organisation Details
- Update Client screens
- Open the Rent Calculator
- Create a Temporary Calculation
- Finalising the Rent Calculation
- How does Chintaro arrive at these results?
Update System Parameters
From the Home Screen, click System Maintenance, Reference Tables and select Parameters from the list. Scroll down until you find the fields for SACappingAmount and SACPIAmount.

Scroll down again and ensure the State parameter is set to SA in the Parm Text field.

Update Organisation Details

| Option | What to do |
| Organisation Name, CHO ID, Address | Enter as appropriate |
| Non Member Tenant Levy | Tick if appropriate |
| GST Registered | Tick if appropriate |
| ASL1 - ASL6 | There are 6 additional service levies available to use in the rent record of the tenancy. Tick any ASL boxes which are not to be included in the CRA optimisation (I.E not to be treated as rent). |
Next, go back to Home > System Maintenance > Preferences > Finance and set any ASL's you ticked not to be included in the CRA calculation to No

The corresponding ASL's are detailed below:
Management Fee = ASL1
Non Rent Charge = ASL2
Utility Fee = ASL3
Additional Charge 1 = ASL4
Additional Charge 2 = ASL5
Additional Charge 3 = ASL6
Update Client screens
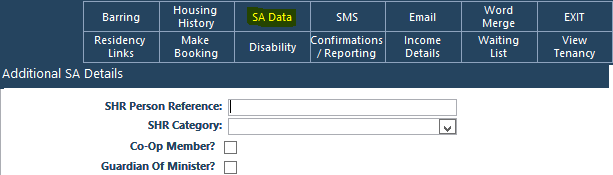
Tick the boxes for if the client is a Co-Op Member or Guardian Of Minister
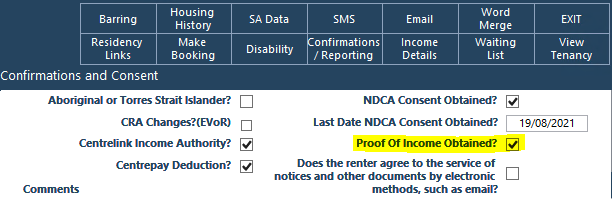
Next, click the Confirmations/Reporting button

You must tick the Proof of Income Obtained box for each Tenant in the household. If any household members do not have this ticked, the household will be charged market rent.
 Click here to learn more about adding and editing incomes manually.
Check the Rent Record of the Room
From the Tenancy screen, click the Edit Rent button, and ensure there is a Market Rent entered for the period that will be calculated. You may have to scroll across to the right hand side of the screen to see the Market Rent field. Add or edit any ASL's in the other columns in the rent record for the period that will be calculated. This will ensure they are captured in the calculation:

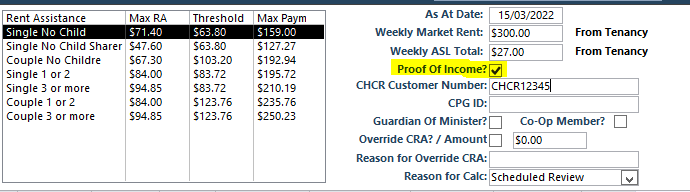
Open the Rent Calculator

Ensure all members of the household are included and each of them has Proof Of Income as Yes (see section Update Client Screens above if 'No'):


Create a Temporary Calculation


If you are not clear on how the Rent Calculator arrives at its calculations, you can check with CP&G for clarification.
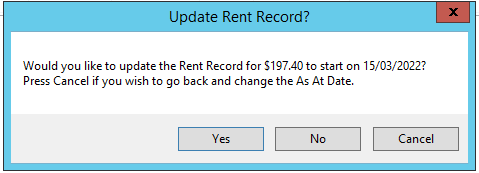
Finalising the Rent Calculation

You will then be prompted to update the Rent record (Edit Rent screen on tenancy). Click Yes to update the Rent Record and your rent review is complete.
How does Chintaro arrive at these results?
Was this article helpful?
That’s Great!
Thank you for your feedback
Sorry! We couldn't be helpful
Thank you for your feedback
Feedback sent
We appreciate your effort and will try to fix the article